Friday, August 27, 2010

Close To My Heart New Product Blog Hop

I was lucky enough to have had the opportunity to attend the CTMH Convention in July. It was at the Convention that the New Idea Book was shared with attendees and I have been busting to share the wonderful new papers since then! I got a tad ambitious this hop....well, wait till you see all of the new goodies and you will be inspired too! :o) BTW - The hop is officially set to kick off at 9:00pm this evening but I had to post a little early because of my work schedule. If you visit me before 9:00 please don't try to hop....come back again at 9:00 for all of the fun!

As is the tradition, it is New Product Blog Hop time. There are over 50 Consultants showcasing their talent and highlighting new products in the Close To My Heart Idea Book that is set to be officially released on September 1st. If you arrived here from Jessica's Blog, you are on the right track. Without further ado, here are my projects....

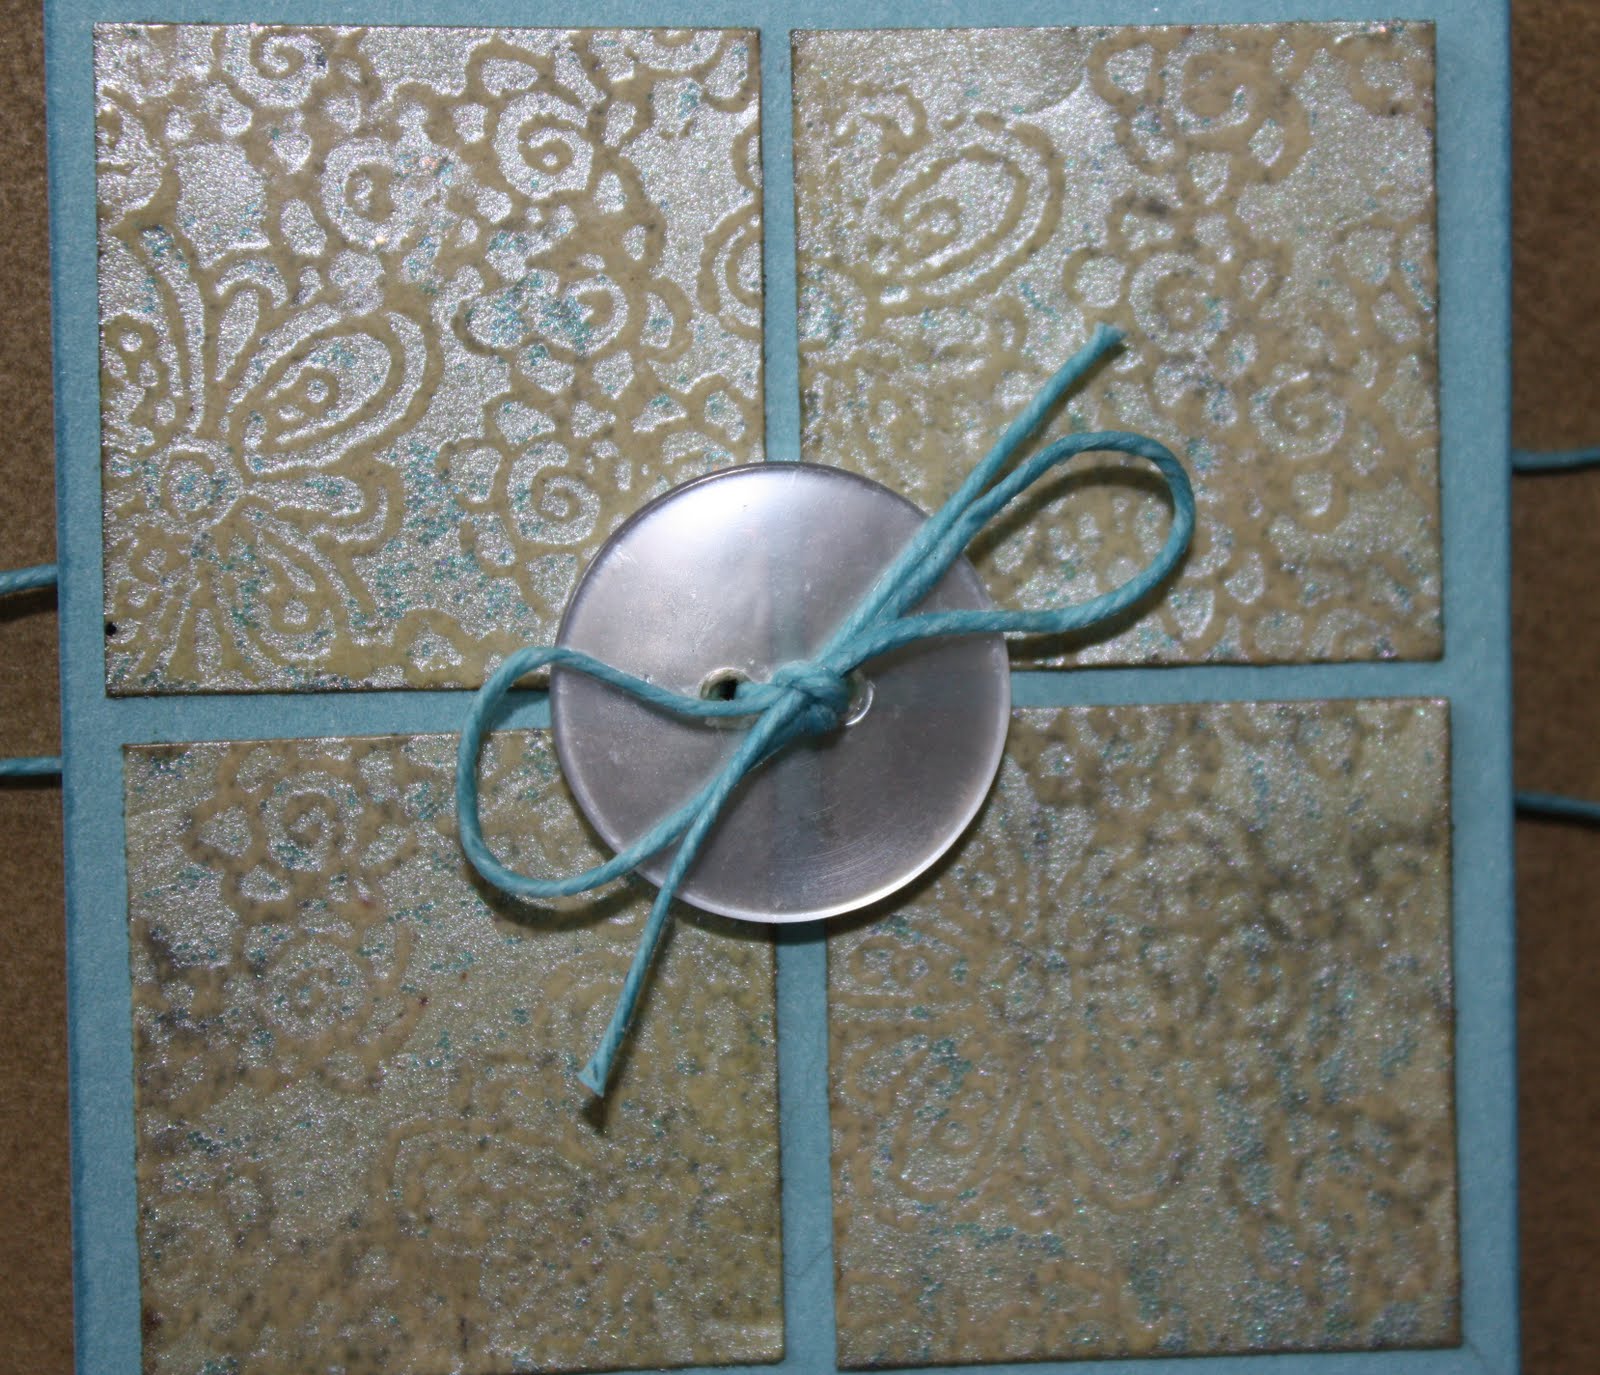
Magnifique is one of the new Paper Packets. It features several of the new colors including Pacifica Lagoon and Sky. When I studied the paper, an Inspiration Book came to mind. CTMH has so many wonderful My Acrylix Stamps that include beautiful sentiments that I thought I would make a collection of them for all to glean encouragement and motivation. The book is completed on as a 6 x 6 Chipboard Album....


I used many products to complete the book. Here is a list of the new products that are featured: Magnifique Paper Packet, Pacifica, Lagoon and Sky Card Stock and Ink, Cotton Candy Ink, Lagoon Brads and Ribbon, Circle of Love, Unity and The Present My Acrylix Stamp Sets.


What release of a Fall/Winter Idea Book would be complete without a Christmas Card? I have to say that there have been many CTMH Paper Packets, but I am really beginning to think that Mistletoe is my favorite!


If you look closely, you will see that the card is an A2 size card folded slightly off center. That's a trick I learned from my good friend from across the pond. :o) The images were stamped with the set included in the Mistletoe Workshop on the Go. I Love Them! This is a set that is only available in the WTOG kit. The pattern paper is, of course, Mistletoe and the green ornament is a new dimensional element from the Ornaments set.


Last but not least is a card made using Hooligans (the Halloween paper) and a stamp set called Fright Night. To make the "fall" night sky, I sponged Gypsy (another new color and Outdoor Denim on Colonial White card stock. The fence was heat embossed in black with Prisma Glitter mixed in with the powder.


One of the reasons I like the Fright Night Stamp Set is the black cat image that I have stamped on the fence. As you can see, I am partial to cats. As I was trying to take the picture of the card, Bombay, my year old kitty insisted on helping. I don't think she is quite as scary as the stamped cat, but that is a annoyed look on her face. What do you think?


It's time to hop on over to Haley's Blog. Thanks for hopping along. For Now, Happy Crafting!

New Product Blog Hop Participants

It has become a tradition that when a new Close To My Heart Idea Book is ready to be released, many Consultants get together and hold a Blog Hop to celebrate the occasion. This release is no different. The Blog Hop begins this evening at 9:00pm ET and I wanted to take a moment before the fun to acknowledge all who are participating. For Now, Happy Crafting!


Erin http://tazzygirl2000.blogspot.com
Wendy http://www.myscrapbookingblog.com/
Meredith http://Meredithburgess.blogspot.com
Carla http://carlacreates.blogspot.com
Georgia http://inkygeorgia.blogspot.com
Helen http://www.hookedonstamping.com
Beth http://www.bethscreativeblock.blogspot.com/
LaJeania http://www.scraptilyoudrop.blogspot.com/
Sheila http://sheila-bennett.blogspot.com
Traci http://www.creativetraci.blogspot.com/
Lisa http://www.lisascreativecorner.blogspot.com
Heather http://www.creativecoconut08.blogspot.com/
Lori http://scrapinglori.blogspot.com
Kimberly http://www.verykimberry.blogspot.com/
Jessica http://jessicaspaperpetals.blogspot.com
Cindy http://www.paperspadsandpictures.blogspot.com/
Haley http://inkyscrapper.blogspot.com
Wendy http://papercreationsbywendy.blogspot.com
Antoinette http://www.godblessyourart.blogspot.com/
Jennifer http://whatchadoin-jennifer.blogspot.com
Laurie http://www.scrapsfromthebeach.blogspot.com
Kathleen http://scrapbookaddictkath.blogspot.com
Adeline http://www.adeline-brill.blogspot.com/
Melinda http://ifyoublingittheywillcome.blogspot.com
Teri http://www.themidnightartist.blogspot.com/
Leisa http://bigredscraps.blogspot.com
Brae http://thebrae-er.blogspot.com
Tresa http://www.fabulouslyartsy.blogspot.com/
Jennifer http://www.aglitterymess.blogspot.com
Karen http://www.gettinscrappywithit.blogspot.com
Dawn http://www.stamptildawn.blogspot.com/
Lori http://scrapbookingandbling.blogspot.com
Toni http://whollycrafts.blogspot.com
Jean http://stampinmaui.blogspot.com
Dawn http://iamahappystamper.blogspot.com
Janelle http://stampandthecity.blogspot.com
Cristin http://www.scrappinwithcristin.blogspot.com/
Cheryl http://evenmorescrapping.blogspot.com
Tracey Jean http://traceyjean.blogspot.com
Rochelle http://delightfulstamper.blogspot.com
Debbie http://scrapmyheartout.blogspot.com
Brandy http://canadianscrappers.blogspot.com
Amy http://www.paisleysplayhouse.blogspot.com/
Michelle http://www.michelleloncar.blogspot.com
Terrie http://my-life-in-real-time.blogspot.com/
Amy http://amylizschultz.com
Janice http://janscrapsandbits.blogspot.com
Carol http://carol-scrappininparadise.blogspot.com
Carrie www.bizzymom.us
Lori http://clearlyfromtheheart.blogspot.com
Amy http://amyslifeandcreations.blogspot.com
Nancy http://brujahrose.blogspot.com
Sheila http://cre8yourjoy.blogspot.com

Scrapbook Design and You Class

I recently mentioned that I was working on layouts to use as samples for my upcoming Scrapbook Design and You class. I completed my Scrapbook Design Certification! Yippiee! I have on finished that I want to share. The classes are being held at the Michaels in Collegeville PA. I am teaching 2 sessions....one in the evening and one in the morning. Evening classes will begin on Wednesday September 8th and will run 4 consecutive Wednesdays and the morning classes begin Thursday September 9th and also will be held 4 consecutive Thursdays.


I learned so much while taking the certification and can't wait to share the information. The course covers everything from the basics of what really is a scrapbook to design theory and color management. It even covers how to journal more effectively and the use of all kinds of wild and wonderful tools!


This layout uses pictures I took in 1998 while on a 3 week trek through Europe. Oh was I lucky to have had the opportunity to take that trip. Anyway, the papers and embellishments (except for "Tuscany") are from the Close To My Heart paper packet called Notebook. Unfortunately, Notebook is no longer available but it was perfect for these photos. The LO incorporates a number of the techniques and principles that I will be covering in the class. So, if you live in the Philadelphia PA area, consider taking the course....it is truly a great learning experience.

By the way, the Close To My Heart New Product Blog Hop begins later today. Don't forget to check back for not only my contributions, but also, the work of my CTMH Consultants as we kick off the brand new Idea Book set to be released on September 1st. For Now, Happy Crafting!

Tuesday, August 24, 2010

Mojo Monday 153

Finally, something created that I can post! :o) I have been so busy getting ready for the upcoming Close To My Heart New Product Blog Hop, the Make It From The Heart Contest and samples for the class that I will be teaching in September that I haven't had a chance to create anything for my blog. Today, I finally decided to take a break and do something I could post.

I immediately went to Mojo Monday to check out this week's challenge. And, it was a good one...
Today the temperature is a bit below normal and when I looked at the sketch, I immediately thought of falling leaves. Here is my take on the sketch...

The card is made on a Colonial White A2 Base and the first layer is from Back Country. The solid mat is Goldrush cardstock that has been edge distressed and tone on tone stamped with images from Playful Flourishes (D1212). The leaves and sentiment are from the upcoming Petite Perks My Acrylix set called Leaves and Things. Petite Perks are only available through your CTMH Consultant. This set will be available when the new Idea Book is released September 1st. I used Barn Red, Goldrush and Olive inks along with my blender pen to color the leaves.

I promise that I will post some of the samples and the details on my Scrapbook class soon. Also, the Close To My Heart New Product Blog Hop kicks off on August 27th so don't forget to hop along and check out all of the wonderful new products in the Fall Idea Book. For Now, Happy Crafting!

Sunday, August 15, 2010

Craft Fair/Flea Market

Where have I been? Busy of course...when the Open Crop was postponed, I decided not to waste a day off to I found a Flea Market to participate in and began to feverishly make items to sell. Since it is "Back to School" time, I chose to make items with that in mind....sorry to all of my teacher friends about the reminder that September is rapidly approaching. Anyway, new items created included: Bookmarks with matching binder clips, magnetic bookmarks and Card Kits. Robin (one of my DL) came along and contributed greatly to the success of the day.


Sorry for the quality of the photos....they were taken from my iPhone. Remember Bombay, my now year old not so tiny kitten??? Well, she had to get into the Flea Market fun when I got home and began to unpack...

What else have I been doing since my last post? I became a Certified Scrapbook Design and You instructor...more about that later and when and where the classes will be taught. For Now, Happy Crafting!

Friday, August 6, 2010

All Day Crop

Just wanted to let everyone know that the All Day Crop scheduled for August 14th has been postponed until October 16th. I'll supply more details soon. For Now, Happy Crafting!

Wednesday, August 4, 2010

CTMH Appreciation Sale

Starting today (11:00am EDT), CTMH is holding an unbelievable sale! Level 2 paper packets for $6 (12 sheets of pattern paper and 10 sheets of card stock), Level 1 paper packets for $4 and Stickease for $2! The list includes some of our all time favorites like Evensong, Jingle (Christmas) and Animal Cookies and Perfect Day! These papers will be retiring so once they sell out, they're gone forever. Check out my website for the full list and get the papers you need to complete those projects! As always, you can contact me with any questions. For Now, Happy Crafting!

Tuesday, August 3, 2010

Fancy Fold Card Class and All Day Crop!

If you live in the Philadelphia PA area, mark your calendar for August 14th. I am helping with a great all day crop to be held in Upper Darby. Details are on my sidebar. I will be teaching a Fancy Fold card class at the crop and I thought I would share pictures of the cards that we will be making.

This is an easel fold card that will fit perfectly into an A2 envelope! We will be using Caboodle B/T Duos, Colonial White, Chocolate and Sweet Leaf card stock. The My Acrylix stamp set is called Smiles.


This card is on a Tulip card base and will also fit perfectly into an A2 envelope. It also uses Cherry-O Creative Basics, Crystal Blue and Colonial White. The My Acrylix Stamp Set is called Love Birds.

Throughout the class I will be covering techniques such as scoring and folding, sponging, edge distressing, use of clear stamps, tips on measuring card stock and adding a touch of bling to your projects. The cost of the class is $6 if you attend the All Day Crop and $16 if you come just for my class. The fee covers all materials to walk away with 2 completed cards. Please bring your favorite adhesive.

Contact me for more details or to sign up for the Crop and my Fancy Fold Card Class. Hope to see you. For Now, Happy Crafting!

Saturday, July 31, 2010

Close To My Heart August Stamp of the Month Blog Hop

It's hard to believe that it is time for a new Close To My Heart Stamp of the Month. And, as is tradition, that means it is time for another Blog Hop! This entry marks my one year participation in the event! :o)


This month, CTMH has selected a very useful My Acrylix stamp set called Something Splendid. The set contains 13 images including flower heads, leaves, stems and sentiments. Just perfect for later summer and early fall projects. Remember, you can purchase the STOM for $22.95 or earn it at reduced rates or even free by making a qualified purchase of other CTMH items. Visit my website for more details.


If you have arrived here from Haley's Blog you are on the right track. There are over 60 participants in this month's Hop.


When I was thinking about what to do for this month's Hop, my thoughts turned to all of you who are beginning to prepare for a return to school. Close To My Heart offers a great alterable Journal (Z1268). What makes this Journal so good is that it has a plastic sleeve to protect your artwork!


The Journal measures 5 x 7 so to start out, I cut a piece of Colonial White to that measure. I edged distressed it with Cocoa. Next, I cut a piece of Grace B/T Duoes to measure 6 3/4 x 4 3/4 inches, sponged the edges with Honey and attached it to the Colonial White. The focal point measures 2 1/4 x 4 inches. I randomly stamped the stems included in the set along the two edges in Cocoa and then randomly stamped a leaf image in Olive along the stems. Next, the flower was randomly stamped over these images in Honey, Twilight and Barn Red. The entire piece was distressed in Bamboo using a stipple brush. The edges were also ink to paper distressed. "Seize the Moment" is stamped in Olive and Glitter Gel was added to the centers of several of the flowers. While the gel was drying, I attached the sponged Twilight and Barn Red mates (each measures 3 x 3) and the buttons. That's Waxy Flax tied in the button centers....love that stuff. The focal image is matted with Cocoa and was popped up with 3D Foam tape when attached (after the gel was dry). Lastly, the ribbons were added to the wires.


For my second project, I completed a 6 x 6 card that also features the Grace Paper Packet. The base is Twilight. The image was heat embossed in Cocoa on 140 pound watercolor paper that had been "stained" with a watercolor wash of Honey, Buttercup and Goldrush re-inkers.


It's now time to hop on over to Laurie's Blog. For the second month in a row, I've not been able to post the list of all participants, so please forgive me. Should you get lost along the way, head back to the beginning with Kathleen's Blog. Thanks for hopping by. For Now, Happy Crafting!

Thursday, July 29, 2010

Close To My Heart - CTMH - Cards and Watercolor Technique

I guess I have to get better at uploading these things....hehehe....

My First YouTube Tutorial!

I've finally finished it! My very first YouTube tutorial on a watercolor pencil technique for cardmaking. I won't even begin to tell you all of the issues I had trying to get it done but it is completed so that is what is important. All in all, it was fun and I will definitely do more! Here it is....

http://www.youtube.com/watch?v=LZGjJSt9bKU

For Now, Happy Crafting!

Sunday, July 25, 2010

A Card with Water Color Pencils

I am so happy that I took those classes on water color and color pencil techniques. I have been able to really enhance my coloring! Here is another example of what I learned in the class....


The stamp is from "House Mouse." I just fell in love these meases to pieces.... :o) The card stock is Close To My Heart Crystal Blue and run through my Cuttlebug for texture.l I matted the mice with Cocoa. The image is water colored using a totally different technique than my last post on color wash. I hand painted the mice....yes me....hand painted!

These techniques are far to good to keep to myself, so most of yesterday was spent on tutorials to share with you on the techniques. Watch for them as I my plan is to have them posted by the end of the month! For Now, Happy Crafting!

Friday, July 23, 2010

A Watercolor Wash Card with Heat Embossing

A few days ago, I had the opportunity to take 2 great classes with Dave Brethauer owner of The Memory Box Stamp Company. In the first class, he taught us different techniques for using wax based coloring pencils. The second class taught several techniques involving watercolor.


Once home, I was so excited to try all of the fun techniques, I didn't know where to begin. As I thought about it, I came up with an idea using his techniques with a little of my own style thrown in. Splitcoast Stampers also had an interesting challenge posted today. The challenge was to make a card that included only the cool colors of blue, green and purple. (Blue and Green is my favorite color combo.)


Using CTMH re-inkers in Olive and Moonstruck, a water brush and 140# watercolor paper, I completed the background for my heat embossed image. You know, re-inkers aren't only for re-inking your stamp pads....they can be used for dying ribbon, making spray mists, tinting pearl paint...the possibilities are endless. Anyway, once the background was dry, I heat embossed the image from Childhood Portrait (D1373). The edges of my Spring Iris card base along with the Moonstruck layers were sponged and the card was assembled. I added Bitty Sparkles (Z1263) to the corners and tied the White Daisy organdy ribbon. The card was done.


By the way, the sketch for the card is from the "Wishes" Card Confidence book. Jeanette Lynton, Owner and CEO of Close To My Heart has written several how to books that include card and scrapbook layouts and techniques. They are wonderful! Check out my website for more information on how you can get your own copy of "Wishes" and the re-inkers in every beautiful color CTMH makes.

When you discover a new technique, don't be afraid to try it. Play around with what you have learned and make it your own. Visit often as I plan to post tutorials on this technique and many others I have recently learned. For Now, Happy Crafting!

Tuesday, July 20, 2010

Farmville and Fishville Fun!

Ok, admit it....do you spend time on Facebook playing Farmville, Fishville, Yoville, Mafia Wars.....So many of us do... :o)
Yesterday, when trying to think of a card that I should make, I paused to "harvest my crops" and came up with this idea!


For those of you not familiar with the Facebook games, let me explain. The goal of all of the games (they are all basically the same, just a different theme) is to befriend as many people as you can to be your "neighbor" and play along with you. The more neighbors the more points and options you have to grow your farm or fish tank. :o) This card was made as a "hello" for all of my "neighbors."

The card is done on a 6 x 6 inch base of textured Colonial White. The edges are ink distressed. The next layer is Brown Bag that that has been scored, sanded and ink distressed. The barn image was heat embossed in cocoa and watercolored. "Howdy Neighbor" was stamped in Brown Bag on Twill ribbon. (Both the barn and sentiment are from the CTMH My Acrylix set called "Howdy.) The Garden Green pattern paper is from the Passages B/T Paper packet. The pearls at the top are called Opaques and are a little tiny sneak peak at embellishments to come in the Fall Idea Book.

So, I say "Howdy" to everyone....Farmville....Fishville or anyone out there as I call everyone my Neighbor! For Now, Happy Crafting!

Friday, July 16, 2010

Chipboard Is Not Just For Embellishment

One of the things I learned at the recent CTMH Convention was that Chipboard is really hot right now. Chipboard can be used to add depth and interest to our layouts and cards. CTMH makes great chipboard elements called IRRESISTIBLES. These dimensional elements for your projects come in multiple shapes and have a raised area that resists ink. The effect is wonderful. When you sponge on ink a design magically appears!

This was a fun card to make and it highlights the chipboard butterfly used as not only an embellishment but it also holds the card closed!
To make this card, I cut Indian Corn Blue cardstock to measure 11 x 4 1/2 inches and scored at the 2 3/4 and 5 1/2 mark. Buttercup cardstock was cut to measure 4 1/4 x 5 1/2 inches. I heat embossed the flourishes (from Playful Flourishes...D1212) in Silver Pearl (Z678) embossing powder mixed with Prisma Glitter (Z134.) Next, I cut pattern paper from Sweet Home (X7116B) to measure 2 1/2 x 4 1/4 inches and attached it to the front flap. The sentiment, from So Sweet (C1389) was stamped on White Daisy in Barn Red and matted with Barn Red cardstock. Each layer was lightly sponged with tone on tone ink. I added Sparkles (Z1104) for some extra bling. The flower on the sentiment was punched from a multi-layer punch I have in my stash. Now for the "Irresistible" butterfly...I sponged the center in buttercup and the outer edges with Indian Corn Blue. See how the body and designs on the wings just pop? What a great effect, don't you think? :o) I attached only one half of the piece so that the front of the card would tuck securely under his wing.

And, now for another look at the completed card...

I really enjoy making fun folded cards and using Chipboard really adds interest. For Now, Happy Crafting!

Tuesday, July 13, 2010

Jeanette's Color Challenge, Mojo Monday and Techniques from the CTMH Convention

My head is still spinning from all the wonderful information I learned at the Close To My Heart Convention. I surfed the web this morning to find some inspiration to play with the promised first technique...ink resist with rub ons. First I stopped by Jeanette Lynton's blog for her weekly color challenge. Hummmm...Crystal Blue, Heavenly Blue, Desert Sand and Bamboo. Next, I stopped by Mojo Monday and found this great sketch...


And there you have it...a winning combination.

The card is done on an A2 card base of Desert Sand. The next layer is Bamboo and the third layer is Desert Sand. On the third layer, I adhered stem Rub-Ons from "Love Story" (Z1135). I brayered the layer with Desert Sand ink. Next I had to remove the rub-ons. Here is the trick...scotch tape. The tape will pick up the rub-on without problems. I used my "Rub and Remove Eraser" (Z1207) to clean up the last little tigs of rub-ons. This eraser is one of the handiest tools I have. It removes excess adhesive, rub-ons and even cleans dirt from your stamps! After the rub-on material is removed, you are left with untouched cardstock. This is called Ink Resist with Rub-Ons.

You can see clearly see the uninked stems. To follow the Mojo Monday sketch, I tried another resist technique. First I cut a 2 1/4 inch square in Crystal Blue and a 2 inch square in Bamboo. I randomly stamped flowers and leaves in VersaMark from "Smiles" (C1397) on the Bamboo. I heat embossed with clear powder. Now comes the fun part...I mixed Pearl Paint (Z1039) with Prisma Glitter (Z134), a few drops of Heavenly Blue re-inker and a few drops of water. When the heat embossing was cool, I painted it with the mixture. When that was almost dry, I wiped it with a paper towel removing the paint from the embossed area. What you are left with is the embossed images in bamboo and a shinny background!


To finish the card, I cut the 2 inch Bamboo square into 1 inch pieces and attached it to the Crystal Blue Square. I added the clear button in the center using Liquid Glass (Z679) and cut a length of Crystal Blue Waxy Flax (Z1247) long enough to be able to both tie the bow in the button and to wrap it around the brayer cardstock. I cut out the scallop circles and stamped "Happy Birthday" in Heavenly Blue. Happy Birthday is from Holiday Hoopla (D1382). I added Bitty Sparkles (Z1263) for a little extra bling. Bling is oh so important right now! :o) Lastly, I assembled the card, popping up the brayered and painted layers. And, now for one more look at the completed card...


What a fun card to make! I learned so many great techniques at Convention and can't wait to share more of them with you! As always, if you have any questions, feel free to contact me. For Now, Happy Crafting!

Monday, July 12, 2010

Close To My Heart Convention Review

Wow....is all I can say! I am home from the CTMH Convention that was held in Washington DC. What a wonderful time. The new friendships, the new products, the new ideas easily boggle the mind. I was so impressed with the time and effort that was put into the production of the Convention. Even the littlest detail was not forgotten. Our General Sessions included updates on the company, an introduction to new fall products (more about them in later posts), the wonderful philanthropic work that CTMH does with Operation Smile and even a question and answer session with Jeanette Lynton (the Founder and CEO). We had business classes and many hours of technique instruction. There are also many changes/improvements being made in Studio J. If you remember, Studio J is CTMH's Online scrapbooking program. The modifications are great and coming soon, you will be able to a jpeg of your work!

I am still absorbing all of the wonderful information I learned. There are so many new techniques to share and I have already decided on the first one that I will post...it involves rub on and a brayer!

I leave you with just a few pictures of the great festivites. Don't forget to check back for more techniques and information! For Now, Happy Crafting!


Wednesday, June 30, 2010

July Close To My Heart Stamp of the Month Blog Hop

It's that time again and this month, the CTMH Stamp of the Month blog hop. July's STOM is so cute. It is called Happy Forever and it contains 4 cute little figures. Some people have called them hedgehogs, but I think they look like smiling porcupines! :o) It also contains 3 sentiments and a heart and a butterfly. Such a fun stamp that has so many possibilities. If you have been hopping along, you have seen all the ways it is being used. This month we have many participants including one of my new downlines - Nancy.

Without further ado, if you have arrived here from Debra's blog you are on the right track. Each STOM hop, I try to do something a little different. This month, I recycled a pretty jar vase that I got as a favor at the Wedding of a good friend's daughter earlier in June. It is always fun to have there little tokens of remembrance.


I heat embossed the little guy with Cocoa Embossing Powder, cut him out and then colored him with great watercolor pencils that I received as a RAK from a good friend. I attached him using Glue Dots. The butterfly mixed in the flowers is from the Hot Diggity set. I stamped it in Hollyhock, cut it out, added bitty crystals to the antennae and attached him to a silver pipe cleaner. The daisies and Bee Balm are from my garden. :o)

I always have to make a card, too, for the Hop. For this card, I used Caboodle and again colored the litte guy with the watercolor pencils.


It's time to hop on over to Antoinette's blog and check out what she did with this fun Stamp of the Month. Thanks for hopping by and For Now, Happy Crafting!

Getting Ready for the July Close To My Heart Blog Hop

It's that time yet again....hard to believe...The July Stamp of the Month Blog Hop kicks off later today. I just heard on the news that here in Philadelphia we had 15 days of 90 degree heat in June! The report indicated that it has only ever happened one other time....June 1943. WOW...

Anyway, the July STOM is light and airy and just perfect for these hot days. Blogger is not cooperating. My intent was to post all of the participants and it just isn't working. So, if you get lost along the way here is a link to the Helen's blog. She is the kind soul that coordinates this monthly project. For Now, Happy Crafting!

Thursday, June 24, 2010

Passages and Paper Piecing

Wow, has it been a long time since I had an opportunity to update my blog! But, just because I haven't updated, don't think that I have been taking it easy. I have been working on plans for my trip to the Close To My Heart Convention including my roommate gifts and my swap cards. I'll post them later. :o)


I wanted to share this card I made using the paperpacket called Passages. This set is new to the Summer Idea Book and has so many possibilities. I also used a stamp set called Beary Busy. I fell it love with it the minute I saw it.


The card is 6 x 6 and the template is from the Originals Card Confidence book. I know I talk about the CTMH template books frequently, but they are just so helpful. The image of the busy bear was heat embossed and then watercolored. If you look closely at the image you will see some paper piecing...


The old style truck just had to be done this way....I restamped the truck on Brown Bag paper and cut out the side panels. I then scored and sanded it and lasted used ink to paper distressing. Voila! A woodie! Ok, I dated myself....for those youngins out there, a woodie was a truck that had the side panels covered in wood. They were quite the rage when my Mom was a child!


I also wanted to share a RAK I received from my good friend Andrew....


Thank you, Andrew....what a beautiful card! For Now, Happy Crafting!