Saturday, January 31, 2009

Snoopy and Woodstock

I have always loved the Peanut's Gang. I just smile when I think of Lucy charging 5 cents for her pearls of wisdom, Snoopy walking around with his food bowl in his mouth (reminds me of my cat) and Charlie trying to make sense of life.

I was raiding the stash for a stamp to use on Julie's (Splash of Color) Non-Valentine Valentine when I came across Snoopy and Woodstock. This card had to be done!


The design is from this week's sketch challenge on Papercraft Planet. All the supplies were from my stash and I how no clue of the makers. I used my Cricut for the wording, heart and bubble and Cuttlebug for the background.

Off to think of more cards and to get another cup of coffee! For Now, Happy Crafting!

Friday, January 30, 2009

Bottom's Up

Yesterday's challenge on SCS was called "Bottom's Up." The idea was to come up with a card using alcohol inks, markers whatever. Hum...alcohol...right up my alley. Now, now, remember I just got all those markers. I put my thinking cap on, started "bending my elbow" and came up with this...


I needed a drink doing this one... :o). The "tablecloth" is paper pleated and machine stitched. The "window" is a stamp from my stash. I cut a piece of CS the size of the stamp and paper distressed the edges for texture. The window panes were spattered with 2 colors of blue ink and then glittered to make the stars. The "curtain" is lace that I threaded with embroidery floss and then attached with brads. I used my Nesties for the "wall plaque." Textured CS was spattered to make the "wall" above the ribbon "chair rail" and the striped BT paper from CTMH "That's Amore" is the wall paper. I stamped the glasses, colored them with my alcohol markers, cut them out and attached with 3D foam adhesive. I used my Nesties to make the "wall plaque" and just hand wrote "cheers."

Paper: CTMH - That's Amore, Colonial White Texture CS, Colonial White and Cocoa CS, gingham paper from my stash (unknown)

Stamps: Window and drinks from my stash (unknown

Ink: CTMH - Moonstruck, Crystal Blue, Blush, Cocoa

Accessories: Nesties, Cuttlebug, Sewing, 3D foam adhesive, lace, embroidery floss, brads, Cocoa Ribbon, Prisma Glitter, Prisma Markers

I'm off to see what "trouble" I can get into today! :o) For now, Happy Crafting!

Thursday, January 29, 2009

A Blog Award!


A special thank you to Barbara for the Kreative Blog Award! I am new to the blogging scene and it touches me to be acknowledged. Thanks again!

Trying New Things

I was surfing this morning and picked up some new ideas and techniques. So, I had to give them a try.


I stumbled into a tutorial on applying ink to the embossing folder before they are run through the Cuttlebug. Why didn't I think of that? :o) Just apply the ink on the folder (the side that Cuttlebug" is printed on) put the paper on and run through the machine. Make sure you don't move the paper as you are setting it on your plates as it will smudge. I learned that one the hard way.

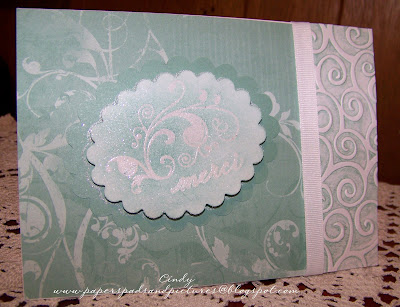
I tried another new technique on this card. I have done heat embossing many times but this time I tried something a little different. The stamp I wanted to use was a perfect match to the paper I was using but it was too big for my Nestie. I covered the portion of the stamp that I didn't want to use with tacky tape. I covered it in the VersaMark and then removed the tape. It worked perfectly when stamped. I used transparent powder and when it had set, I used a sponge to cover the embossing in ink.

Paper
CTMH – Key To My Heart, Juniper and White Daisy CS
Stamps
CTMH – Key To My Heart, Just Because
Ink – Stamp Pads
CTMH – Juniper and VersaMark
Accessories
Heat embossing, Cuttlebug embossing folder, Prisma Glitter, White Daisy Ribbon

The creative wheels are turning and I am in the middle of working on another card that I hope to get finished soon. For Now, Happy Crafting!

Bouquet in the Snow

It was snowy and icy all day yesterday so that meant I didn't stick my toe outside . I played all day! This card was completed for the SCS sketch challenge.


Paper

CTMH – Paper Garden BT Duo, Buttercup and Colonial White CS
Stamps
Hero Arts and Morning Star
Ink – Stamp Pads
CTMH – Garden Green
Accessories
Prisma Markers, Cricut, brads

I have been playing around with stamping, scrapbooking and photography for years but have only entered the world of blogging a month ago. I remain amazed and impressed with the talent and creativity that I am seeing! It's icy again today, so I plan to spend my day looking and learning! For now, Happy Crafting!

Wednesday, January 28, 2009

A Blog Award!

Yippie!!! Thank you Julie from a "Splash of Color." I now have to tell you all 5 of my addictions...so here goes (not in any particular order)...

1. Helping and working with others


2. Creating things...stamping, scrapbooking and crocheting


3. Black Coffee until noon and then Diet Pepsi


4. Learning what ever I can about the world

5. Collecting Pineapples. Yes. Pineapples were the Colonial sign of Welcome. I have almost everything imaginable from dish towels, coasters, plates, salt and pepper shakers, glasses, wall hangings to candle holders. I have a German papercut pineapple and courtesy of a good friend, a pineapple shower curtain. I think you get the picture!
Now I pass this wonderful award on!
For now, Happy Crafting!

Tuesday, January 27, 2009

Cinema Saturday Creative Challenge

Cinema Saturday Creative Challenge is such a great challenge. Each week, these creative ladies select a movie and your challenge is to complete a card inspired by their choice. There is usually a twist thrown in too. Check out their blog at: http://cinemasaturdaycreativechallenge.blogspot.com/


This week's movie was "The Wizard of Oz" and the twist was "metalic."

When I hear "The Wizard of Oz," I immediately think of Judy signing "Somewhere Over the Rainbow" so my inspiration was easy. The card is on a 5 X 7 base with the the mats cut at 1/4 inch increments. I randomly stamped the stars (CTMH - Shinning Star) on the background in Versamark and used what else but "Stardust" embossing powder. The large star is from the same stamp set and also heat embossed. I cut the tag with my Cricut and hand printed and heat embossed "Wish!". I used strands of embroidery floss in the colors of the rainbow to attach the tag. I attached the large star with a 3D foam square. The paper has a slight sparkle to it and it is from my stash (maker unknown.)


I am anxious to see what next week's challenge will be! For now, Happy Crafting!

A Splash of Color

I am on a roll this morning! Here is the card that I just completed for Julie's "Splash Theme Thursday Challenge." Checkout the challenge on her blog - http://splashofcolor-juliestamps.blogspot.com/.

1. Card base is 7 X 5 inches and is Key To My Heart BT Duo paper.
2. 1st white mat was cut to measure 6 ½ X 4 ½ inches. It is randomly stamped in Juniper ink with small butterfly from Wonderful Charms set.
3. Juniper CS was cut to measure 5 X 3 ½ inches and embossed in Swiss Dot Cuttlebug folder.
4. Small white CS cut to measure 3 ½ X 3 ½ inches. Stem image was stamped 3 times in Juniper ink.
5. Butterflies were cut in Juniper CS with Cuttlebug die cut and attached to small white CS.
6. Glitter was applied to butterflies.
7. Length of White Ribbon tied around larger piece of white CS.
8. Card was assembled (as pictured) on card base.
9. Glitter was applied to one small corner butterfly on larger white CS.

Paper
CTMH – Key To My Heart, Juniper and White Daisy CS
Stamps
CTMH – Wonderful Charms and a stamp from my stash – Dee Grueing
Ink – Stamp Pads
CTMH – Juniper
Accessories
CTMH – White Daisy Ribbon, Prisma Glitter, Cuttlebug embossing folder and die cut

I'm off to make another card! For now, Happy Crafting!

Scrapbook Layout

Well, it's snowing AGAIN in Philly this morning. A good day to craft. I completed this page yesterday for the Monday SCS inpiration "One." We were charged with the task of completing a page using 1 piece of CS, I piece of pattern paper, a one word title and only 1 picture. This was harder than you think! Fortunately, my pattern paper is two sided ;o) I am really lucky to have many old family photographs. This is my Grandmother's High School graduation picture circa 1907.


Paper: CTMH – That’s Amore and Colonial White CS
Stamps:
CTMH – Heritage Caps, Key To My Heart, Adorning Corners
Ink/ Stamp Pads : CTMH – Tulip
Accessories: Sewing Machine, flowers, brads

I'm off to work on a card for Julie's "Splash of Color" Challenge. It's almost done. For now, Happy Crafting!

Sunday, January 25, 2009

Tips and Techniques

I was reading a thread on one of the crafting boards about how "clear" stamps are difficult to work with and won't give a clear image. WRONG! Like anything else, you have to know how to use the tool properly.

Here is the "How To" for Close To My Heart "My Acrylix" clear stamps:


1. Like any other stamp, a clear stamp should be "seasoned." Select the appropriate size block, attach the stamp (they just stick on really easily) and rub the stamp across the stamp pad.

2. Stamp several times on scrap paper...repeat the process if you like.

3. When you are ready to stamp, apply the ink properly...

a. tap tap
b. twist twist
c. tap tap

Because the stamps and blocks are clear, you can double check that you have full ink coverage.

4. Stamp on your project paper. You don't need to press hard...just apply even pressure on the image. Again, this is easy because the stamp and block is clear and you can see what you are doing.

5. Each "My Acrylix" set includes a foam sheet. If you wish, you can place that sheet under the paper when you stamp. This helps you apply even pressure.

I really like the clear stamps. Being clear, you can see exactly where you are placing them!

I also just learned that Close To My Heart is having a 40% off sale on selected products starting Monday January 28th at 10:00am EST. Check out the products on my website! Don't be afraid of clear stamps, they work wonderfully! For now, Happy Crafting!

Saturday, January 24, 2009

It's Saturday..."What's Cooking?"

I love challenges! I enjoy a TV show or movie that encourages me to "think" about the world around me. I enjoy an enlighten, spirited conversation that in the end teaches me something. And, I enjoy craft challenges. I love seeing extraordinary talent and creativity. Recently on my CTMH Paper Planet discussion group, I found this really cute challenge. We are to "Bake a Treat." Participants were given a long list of food ingredients that would be used in a recipe. After everyone has "gone shopping," the leader posts the equivalent paper ingredient. You are limited to using ONLY the ingredients you purchased! I "bought" BT Papers (patterned paper), flower (not flour), markers, buttons, chipboard and die cuts. Look closely, no stamps...ahhhh....

So here's dinner...


Recipe for "Recipe for Spring"

1. Card base is 5 X 7

2. BT Paper Garden Kit for the pattern paper

3. Cricut used to cut flower layers in descending sizes from 3 inches to 1 inch. Petals were cut from Paper Garden sheets and white CS (white was a freebie)

4. After petals glued together, the button was attached for the center

5. The stem and butterfly are plain chipboard that was colored with Prisma Markers

6. The buttons and butterfly were attached as trim

Speaking of dinner, time to check on my homemade veggie soup that has been cooking all afternoon...no stamps in it either...For now, Happy Crafting!

Wednesday, January 21, 2009

Good Morning!

I started this card last night and finished it this morning. I thought the new Close To My Heart "That's Amore" papers were perfect for this rose.
Paper
CTMH – That’s Amore, Blush and Colonial White CS
Stamps
Anita’s
Ink – Stamp Pads
StazOn – Stone Gray
Accessories
Prisma Markers, Cricut, Ribbon
This brand new My Reflections Kit, "That's Amore" is useful for so many projects! To see it in more detail check out my CTMH website!

I'm also extending the sign-up date for my Rewards Club. Email me if you want to sign up or if you have any questions!

For now, Happy Crafting!

Tuesday, January 20, 2009

Captured Memories

On such a historic day, this layout seemed appropriate. I completed the Layout for the Monday Scrapbook Inspiration Challenge. As I watch the Inauguration and flip through my old photos, I think about what has come to pass during my life time, during the life times of those who have come before me and what is to come in the life times of those who shall follow me.


Paper
CTMH – That’s Amore, Blush, Garden Green and Colonial White CS
Stamps
CTMH – Key to My Heart and Just Because
Ink – Stamp Pads
CTMH – Garden Green and VersaMark
Accessories
Transparent and Gold Embossing Powder, Heat Gun, Prisma Markers, Blending Pens


May peace come to our world. For now, Happy Crafting.

Monday, January 19, 2009

Another Day, Another Season

Oh well, our Eagles lost yesterday. We can't get upset about the loss because 5 weeks ago we didn't even think they would be in the play-offs! During the game yesterday, amist the newly invented cuss words from DH and the telephone ringing after each play, I managed to get a card done. It was inspired by the Cinema Saturday Casablanca challenge. The goal was to design a card using black, white and your choice of 1 color that was a reminder of the movie. I chose to highlight the vivid tile work of Morocco.


The card is done on a 5 X 7 base. I stamped each of the "tiles" with Versamark and heat embossed each one. The black oval tile was also heat embossed. I used my Nesties to form the frame for the oval tile and randomly stamped the white background.
Paper
CTMH – White, Black and Moonstruck
Stamps
Technology Tuesday – Casablanca
Ink – Stamp Pads
CTMH – Moonstruck and VersaMark
Accessories
Heat gun and Nestabilities

I am currently working on a scrapbook LO to post later this afternoon. For now, Happy Crafting!

Sunday, January 18, 2009

Game Day


"Fly Eagles Fly, on the road to victory."
I wanted to have a little fun before the big game.
For now, Happy Crafting!

The end of a busy day...

What a busy day I had. I finished the card that I posted earlier, watched the train progress from Philadelphia to Washington, did some blog surfing, spoke to a client (my other business), went to the grocery store, tried a new recipe for supper and made the card that I am posting now. Whew....

Before I forget, I owe some answers to questions asked in the wonderful comments I have been receiving.

I was asked what kind of camera do I recommend for a beginner. I am not an expert, but I on on my 6th digital camera. I switched from my old Cannon 35mm years ago...loved that camera but it hasn't been used in ages. Because I got into the digital game early, I have upgraded many times. Three of the camera's including my current one, have been Kodak's. I have found them to be the most user friendly. They have a wide variety of styles and options available from very basic to very sophisticated. Here are a few suggestions to consider before you buy:

1. The first thing I look at is the camera body. I prefer a larger body that reminds me of my old 35mm. Many people prefer the convenience of a small camera. When you are shopping, hold the camera up to your eye as if you are taking a photo. It must "feel" right in your hand.

2. I would not buy a camera with less that 5 megapixels. That most closely reflects the quality of a 35mm photograph. The larger the megapixels the more you can enlarge a photo and the smaller you can crop a section of the photo.

3. Make sure it has a macro zoom feature. This will allow you experiment.

4. Decide in advance (before you go shopping) what kind of photos you will be taking. If you main purpose is candid shots of your family consider cameras that don't have many dials that have to be set or that can move out of position and ruin a shot. Remember the KISS rule. If you are taking pictures of children, chances are you don't have much time to pose a shot.

5. Pick a camera that is not overwhelming. Digital photography is wonderful. You can literally take thousands of pictures, store them on disc and print them any time you want. It should be fun. If your first camera has too many bells and whistles and is frustrating, you won't take advantage of the new world this technology offers.

Someone else asked if I prefer Prisma Artmarkers over Copics. The truth is I have never had the pleasure of trying a Copic...so that is a question I can't answer...

Anyway, here is my second card of the day. I am having fun playing with my new markers.


Paper
CTMH – Paper Garden, Petal and Colonial White CS
Stamps
CTMH – Egg Hunt, Gratitude
Ink – Stamp Pads
CTMH – Garden Green and StazOn – Stone Gray
Accessories
Fiskars Threading Water Punch, Nestabilities, Cuttlebug and Prisma Markers

Well, if I plan on getting anything done tomorrow, I better end this post now. I have to be in shape to watch my Eagles tomorrow! For now, Happy Crafting!

Saturday, January 17, 2009

A Card for the Future

As so many of us are gripped in such awful cold, I wanted to make a card that helped us look toward the future. I took my inspiration for this card from today's SCS challenge IC163 - PB Challenge.


Here’s to the Future Recipe
1. Card is completed on a 6 X 6 base. Sorbet CS used.
2. Cut 2nd Color (Juniper) 5 ¾ X 5 ¾ inches.
3. Cut Pattern paper (Key to my Heart B&T Duos) 5 ½ X 5 ½ inches.
4. Using Nesties cut 2 ovals in Tulip.
5. Using Nesties cut 2 ovals in Colonial White.
6. Stamp Flowers on larger Colonial White CS.
7. Color stamp (Prisma Markers used).
8. Stamp small Colonial White oval using Tulip stamp pad.
9. Attach small CW oval to the smaller Tulip color oval.
10. Attach eyelets.
11. Thread 2 lengths of Ecru Embroidery floss through the eyelets.
12. Attach to patterned paper.
13. Attach stamped CW CS to the large tulip oval.
14. Position and attach to pattern paper.
15. Attach 1 brad to each of the corners
16. Attach patterned paper to 5 ¾ inch square.
17. Attach to card base.


Paper
CTMH – Key to my Heart B&T Duos, Juniper, Sorbet, Tulip and Colonial White CS
Stamps
CTMH – Wonderful Charms and Festivities
Ink – Stamp Pads
CTMH – Tulip StazOn – Stone Gray Prisma Markers
Accessories
Eyelets, Brads, Embroidery Floss, Nestabilities, Cuttlebug

I am having fun playing with my new markers. I hope to get at least one more card done today and plan to post again later this evening. For now, Happy Crafting!

Friday, January 16, 2009

Quick Valentines

They say "Timing is everything." Well, one of today's SCS challenges is to create a Valentine Card using only pinks, reds, and black and white. The card was to be simple enough to duplicate 30 times. As promised, I began my Cards 4 Kids and played along with the challenge at the same time.


I heading back to my card making on this terribly cold day. For now, Happy Crafting!

Cards 4 Kids

I am always looking for a "reason" to make a card. One of my fellow "Group 9 Bloggers" has found a great cause...Cards 4 Kids. Here is the link with all the details...http://shannonssentiments.blogspot.com/. I plan to get started in the morning! For Now, Happy Crafting!

Thursday, January 15, 2009

Good Morning!

BRRRRR...it's cold outside! Just like most of the county, Philly is gripped by bone chilling cold. And, tomorrow is supposed to be worse. It is the perfect time to be crafting! Here is a Note Card that I made yesterday for practice with my new markers.

I used CTMH "My Reflections" Perfect Day patterned paper along with Juniper and Colonial White cardstock. The flower was stamped with StazOn and then colored using my new markers. After I cut out the stamped image, I adhered it to the mats with a 3-D foam circle. I used a chocolate colored stamp pad to highlight the edges of the cardstock.

Don't forget about the Rewards Club that is forming. Email me if you have any questions. I have some surprises planned. For now, Happy Crafting!

Tuesday, January 13, 2009

Monthly Reward Club Forming!

Join in on all the fun of my Close To My Heart Monthly Rewards Club AND get all kinds of benefits. Each club will have six (6) members. Commit to purchasing $25 a month in product and get at least $25 in free product during your reward month. Plus, you will receive 2 Idea Books) and other surprises and freebees. We will have a special project each month.

Club Rules:

1. Order of Monthly Rewards Month will be determined by order of sign up for club.

2. Agree to purchase $25 of product each month for six months. Orders must be placed and payment made prior to the 21st of the month in order to give time for the “Host/Hostess” to select his/her rewards.

3. Participation in any kind of “Club Meeting” not required to be a member of club. A special project will be highlighted each month. Tutorials will be provided.

4. A club member who gets another person to sign up for the next club will receive a special bonus.

5. Should you need to drop out of the Club prior to the end of the cycle, it will be your responsibility to please find a replacement.

I would love to get this going prior to the end of the month so that everyone may take advantage of this month’s very special kit called “The Key To My Heart.” The kit includes 12 sheets of pattern paper, 12 sheets of matching card stock AND a Size E (very large) stamp set. I have the kit and it is a really good deal! I have samples posted on here and in the “My Artwork” section of my Close to my Heart website.

Please email me if you have any questions. I already have several of the projects planned! I look forward to you joining in!

I've been so busy didn't have a chance to post yesterday!

I have been busy. Lots of good stuff getting done which is always rewarding. I HAD to work on my "other business" the last 2 days, but that doesn't mean I didn't make some time for crafting...A day without crafting is like a day without chocolate!

Here is a layout I did for the Monday Splitcoast Stamper Challenge called Button Boarders. I used Close to My Heart Evensong Patterned Papers, my Cricut and leftover buttons I bought for Christmas Cards. I hand stitched the hanger for the ornament. The picture is taken of the Christmas Tree I have in my Living Room. Yes, I have 2 trees...a small, irreverent one is put up in my Rec Room. The theme of that tree is casino and sports memorabilia and barware. The tree is the picture is far more traditional!


Over the weekend, a bug flew up my bonnet...I have been looking at all of the wonderful artwork people are doing. So, I had to go out and get myself Alcohol Markers. Ask my good friend, when the bug starts buzzing, it must be done. I admit, I didn't splurge on Copics, but I did get a few Prismacolors and Bics. I wanted to see if I was able to work with them. I like them and I hold you all personally responsible for being enablers. Here is my first effort.


Waiting for Spring Recipe
1. Card measures 5 X 4 ¼ inches.
2. Cut Juniper CS to measure 5 X 4 ¼ inches
3. Cut pattern paper to measure 2 X 4 ¼ inches
4. Cut Ovals (Cocoa 3 inches and Colonial White 2 ½ inches). I used my Cricut.
5. Dry Emboss Juniper CS at ½ inch intervals.
6. Lightly sand embossing, taking care to only sand raised area.
7. Attach Juniper CS to pre-folded card base.
8. Attach pattern paper to lower portion of card making sure to keep corners flush.
9. Attach length of ribbon to card to cover seam.
10. Stamp Colonial White CS with flower stamp.
11. Color Stamp using Alcohol Markers.
12. Center and attach stamped oval to Cocoa oval.
13. Attach these ovals to card base – slightly overlapping the ribbon.


Paper
CTMH – Key To My Heart B&T Duo designer paper, Juniper, Cocoa and Colonial White CS
Stamps
CTMH – Wonderful Charms
Ink – Stamp Pads
StazOn Stone Gray
Accessories
CTMH - Cocoa Ribbon, Cricut, Prismacolor Markers
Techniques
Dry Embossing


Now it is time to go back to work. I am planning to get lots more done tonight! For now, Happy Crafting!

Sunday, January 11, 2009

Learning to take inspiration from the things around me...

What a good day! I took inspiration for this Layout from a Splitcoast Challenge SBVC58. We were to select a "Wacky Holiday" as inspiration. I picked "Inspire Your Heart With Art" Day. My Mom loved to paint. Short of a few classes at the local craft stores, she never had any training. She had natural, underdeveloped talent. I remember her "talks" about shading, perspective and colors. At the time, it went in one ear and out the other because I can't draw a straight line with a ruler. The more I get involved with papercrafting, these tidbits of information are surfacing from the recesses of my mind. I had these photographs of a few of her paintings. I thought it fit perfectly with the challenge. As the title of this post implies, I am trying look at the world around me for card and LO ideas. I charged forth with this project today and took inspiration as the Eagles marched on to victory! Off to make a card...For Now, Happy Crafting!

Saturday, January 10, 2009

A Snowy Saturday...

The weathermen have been predicting snow and sleet all day. Hum, it snowed for a short while very early this morning and as of this writing, nothing more. There, I have gone and done it, I tempted the "Snow Angels.." When we wake up tomorrow, there will be 6 feet. Don't blame me.


I worked on a Splitcoast Stampers challenge today. I managed to use one new color from my goodies that came yesterday. But, that doesn't mean that I don't love the new stuff I got...that will come later tonight or maybe tomorrow when I am not watching the game. Go Eagles!

Here is the card...

Just Because Recipe
1. Card measures 5 X 7.
2. Cut a piece of Indian Corn Blue (lt. blue) to measure 2 X 6 inches.
3. Cut a piece of Moonstruck (dk. Blue) to measure 2 X 5 inches.
4. Using Fiskars “Threading Water” punch 5 inch side of Moonstruck paper.
5. Cut ovals as follows: Moonstruck 4 inches, Indian Corn Blue 3 ½ inches and Colonial White (off white) 3 inches. I used my Cricket.
6. Cut the book plate and the center using Indian Corn Blue and Colonial White. I used the Sizzix die.
7. Randomly stamp card base with circle stamp.
8. Stamp the piece of Indian Corn Blue using Moonstruck ink.
9. Add Colonial White brads in the center of each stamp.
10. Stamp “Just Because” with Moonstruck ink in the center of the book plate.
11. Stamp the tree in Desert Sand on the 3 inch oval.
12. Attach the stamped Indian Corn Blue strip on the outer edge of the card base.
13. Attach the book plate and stamped small oval to the Moonstruck CS.
14. Attach brads to the book plate.
15. Adhere this piece to the card base bottom. Overlap the Indian Corn Blue CS.
16. Assemble the 3 ovals and attach to the card base.


Paper
CTMH – Moonstruck, Indian Corn Blue, Colonial White
Stamps

CTMH – Just Because, Whooo Loves You, Gratitude
Ink – Stamp Pads
CTMH – Moonstruck, Desert Sand
Accessories
Brads, Fiskars Threading Water, Cricket, Cuttlebug, Sizzix

Well, back to work...if you can call creating work. For now, Happy Crafting!

Friday, January 9, 2009

Oh Boy! Oh Boy!


It's Christmas all over again! My goodie delivery arrived just in time to do more projects. I treated myself to the CTMH "Inks Organizer" and 2 new paper kits..."That's Amore" and "The Key to my Heart" set for Papercrafting Month. Time to go organize and play. Watch what I do with my new stash! For now, Happy Crafting!

Thursday, January 8, 2009

A Day of Work

I only got to make one card today as I had to do some work for my other business. Oh well, can't play everyday. I did get that Valentine Card done that I mentioned. My inspiration was Splitcoast Sketch Challenge 210 and the antique skeleton keys I found in a drawer in my parents' house.


“The Key to my Heart” Recipe
1. Cut 12 X 12 Cranberry CS in half
2. Cut 12 X 12 Colonial White CS to measure 11X 5 inches, center and adhere to Cranberry CS. Fold in half to form card base.
3. Cut Cocoa CS to measure 5 X 5 inches. Lightly sand the paper.
4. Cut Cranberry CS to measure 4 ½ X 4 ½ inches and Colonial White CS to measure 4 X 4 inches.
5. Emboss the Colonial White CS with Cuttlebug and the Mosaic embossing folder.
6. Cut 2 pieces of Cocoa CS to measure 2 ¾ X 3 inches and 2 pieces of Colonial White CS to measure 2 ½ X 2 ¾ inches.
7. Distress the edges of the Colonial White CS with a distressing tool and then ink the edges with chocolate distressing ink.
8. Lightly chalk the edges of the 2 pieces of Colonial White paper with red.
9. Lightly chalk the embossed Colonial White paper with red.
10. Center and attach the small Colonial White CS to the Cocoa CS.
11. Stamp the heart with Cranberry ink and apply Liquid Applique to the grid lines and heat with heating tool.
12. Cut a short length of Cranberry ribbon, thread through key and attach to 1 of the cards.
13. Stamp “Be Mine” in red ink. Another stamped heart can be substituted for the skeleton key.
14. Attach the stamped heart with a 3 D Foam square to the remaining small card.
15. Center and adhere the embossed Colonial White CS to the Cranberry CS. Center and attach this combination to the Cocoa CS.
16. Attach the embellished cards to step 15.
17. Attach 3 Colonial White Brads to the Cocoa CS
18. Center and attach to card base.
19. Stamp small heart on inside of the card.
Paper
CTMH – Cocoa, Colonial White, Cranberry
Stamps
CTMH – Thoughtful Seasons and Festivities
Ink – Stamp Pads
CTMH - Cranberry
Accessories
CTMH – Colonial White brads, Cranberry ribbon, Liquid Applique, chalk, Cuttlebug, Heating Tool, Adhesive
Techniques
Chalking, embossing and Liquid Applique


I try to get inspiration for my scrapbook layouts, cards and pictures from the world around me...so who knows what tomorrow will bring. For now, Happy Crafting!


Wednesday, January 7, 2009

"Welcome to my Garden" Scrapbook Layout


As promised in my last post, here is a 2 page layout showcasing some of my photographs. I started by using the 2nd generation stamping method, randomly stamped 2 pieces of white CS. All of the pictures are 4 X 6 inches so it made the matting easy. Two of the pictures are double matted. I cut the base mat to measure 5 X 7 inches and the second mat to 4 ½ by 6 ½. The 4 X6 card fits perfectly. The other pictures are single matted with a 5 X 6 inch paper. I stamped the small picture in the upper corner and used chalks to add the color. The title is made with Color Ready Alphabet stickers that have been chalked. Both the title and the stamped picture were matted with CS ½ inch larger than the base sheet. I stamped and cut out the same daisy that I used for the background. Some of this cut outs were chalked. I used random lengths of ribbon for the stems of the daisies in the lower corner of the first page and used 3 D Foam adhesive to attach the cut out flowers. The randomly placed daisies were also attached with the 3 D adhesive.

My “eye” told me that it was important to develop a layout that would not detract from the colors and details of the flower photographs. That is why I chose to stick with one color family and simple embellishments. The nice thing about using white cardstock and stamping your own pattern is that the same stamp can be turned into a complementary embellishment!


Project Name
Welcome to my Garden

Paper
CTMH CS – Daisy White, New England Ivy, Olive
Stamps
CTMH – Wonderful Charms

Ink – Stamp Pads
CTMH – New England Ivy
Accessories
CTMH – Olive Ribbon, Color Ready Alphabet, 3 D Adhesive, Photo Adhesive
Techniques
Chalking


I’m now working on a Valentine Card. I am also making plans on developing a quick reference list of techniques. For now, Happy Crafting!

Tuesday, January 6, 2009

My Thoughts on Photography

Scrapbooking is a wonderful showcase for all of these photographs. But what makes a great scrapbook page? In my opinion, the layout, papers and embellishments should highlight the pictures. The pictures should not be merely added to a great layout. The two components need to work in tandem. First, you need to take the right photographs. You can go anywhere on the web and find “Tips for taking great photos” but what I want to share with you are a few things I have learned over the years about taking great photographs.


1. Don’t be afraid to move in close to your subject. Most cameras today have macro zoom functions. When I take “close-ups” I also like to make sure that I take a normal range photo for reference especially if I am planning to use the pictures for “scrapping.” These two pictures were taken in my front yard garden.


2. If you think there are “obstacles” in the way of your planned shot, use the obstacles to frame your subject. I used the opening in the stone wall of this 15th century fort in Lisbon Portugal to frame the cityscape. The lighthouse is in Bermuda. Take notice of how I used the roof line and the treetops in the foreground to add perspective to an otherwise plain white object.


3. Keep the camera handy and ready to capture the moment. I keep my camera set on “auto” so that I can snap in a second. Here is DH asking a police officer in Lisbon for directions and a seal asking for a fish at SeaWorld in Orlando FL.


4. When shooting pictures of interesting buildings, make sure you take the whole structure, but also, take a shot from an interesting angle that highlights the unique features. This is the Tower of Belem in Lisbon. Built in the 15th Century, it was the last thing the famed explores saw when embarking on their momentous journeys and the first they saw upon their return.


5. If you’re taking pictures of street scenes (these thoughts work for family gatherings too) look for the essence of what is really going on. Let your picture tell a story not just flatly show the buildings or people. These pictures are a street in Lisbon and a city square in Madrid Spain.


6. Experiment! The rules always say don’t shot directly into the sun. The beauty of digital photography is just hit “trash can” if it doesn’t work. And, sometimes, you get a winner! This Church is in Old City San Juan Puerto Rico.


7. Hand the camera over to someone else every once and a while. Make sure you get included in all the fun! This picture was taken in Disney World.


Photography and scrapbooking should be fun. Let your papers and pictures tell the story of your life. In the days to come, I will share some thoughts on how to scrap you great photos! For now, Happy Crafting!

Sunday, January 4, 2009

FLY EAGLES FLY...

...on the road to victory...

Short post today as I am making plans to watch the E-A-G-L-E-S!
For now, Happy Crafting!


Saturday, January 3, 2009

Busy Day!

I finally did it...I spent the day totally organizing my stash. It all started because I thought I should start an inventory sheet listing my ink pads and pens by color. Well, I had to pull out all of my stamp pads to start the list. Reviewing the color names carefully, I realized I was missing one that I KNEW I owned. I had to pull out the tub that contained the Christmas themed items. Wasn't there. I pulled out another tub. Wasn't there either. And, before I knew it, almost all my worldly crafting items were piled in the center of my Rec Room. (Well, maybe not all of them, just the items that I am currently using.) The good news is, the missing stamp pad turned up along with 7 boxes of glue splits, 5 blending pens, red glitter I had forgotten I had etc.etc.etc. You get the picture, I have goo gobs of craft supplies. This madness must stop! I hit the local Target and bought a paper organizer and the local grocery store and got boxes of zip lock bags. I became a woman possessed. Each set of color coordinated Card Stock went into a 2 gallon bag that was labeled with the contents. Each set of B&T Duo paper went into a zip lock bag that was labeled. All my labeled bags went into labeled drawers in the organizer. Beautiful. I did have one problem, I had to make room for the paper organizer on the shelf. I then found myself pulling out all the little baskets and placing all the tools and small supplies in labeled zip lock bags. All the wonderfully labeled supplies, papers, tools, pens, glue splits, stamps, ribbons, brads and eyelets fit wonderfully back into their baskets and back onto the shelves. I now know what I have! I sat on the sofa in my Rec Room gazing at my craft shelves and it was good. After a few minutes, I got the bug to make a card. And before I knew it, the stamps, ink pads, pens, glue splits, brads and eyelets were off the shelves all over my Rec Room floor again.

Oh well, here is the card I made and yes...everything is back on the shelves! BTW - the card is made with Close To My Heart My Reflections Paper "Paper Garden." The stamp is CTMH My Acrylix "Wonderful Charms." For now, Happy Crafting!


Friday, January 2, 2009

Scrapbook Pages Take 2

OK, the last post said it took 4 times to get the pictures posted...actually, I lost count of how many times I tried. I shall get used to working with the blog. Patience is a virtue! I really wanted to get this layout posted because it really does show how well the CTMH Notebook papers work for Heritage photographs. For now, Happy Crafting!

Scrapbook Pages Take 1...

When I decided to become a craft consultant, I did a great deal of research into the different companies. Over the years, I have been exposed to all the different lines and Close To My Heart was the clear choice because of the versatility. The paper packs are designed to be used for either cards or scrapbook pages. Here are 2 pages I make using the Notebook pattern. All of the photo's were taken before my Grandfather came to the United States, sometime around 1902. This pattern works perfectly for Heritage pages. I am really fortunate to have many of these old photographs.Just as a side bar, this post has taken me WAY longer to complete than I think it should. I had to reload the pictures 4 times until they were the way I wanted them. I am sure that it will get easier as time goes on. It better, as I have so much to share! For now, Happy Crafting!

Thursday, January 1, 2009

January is National Papercrafting Month!


Key To My Heart


In celebration of the fun event, CTMH is celebrating with a very special collection of stamps and papers. available at very special prices. Check out my website for all the details.